
- File
-
Designs
-
-
All Categories -
Category #1 - New Category
-
My designs
-
-
Help
-
HOW TO SUBMIT YOUR TSHIRT DESIGN OR DTF ORDER
-
1) Press "File" in the navigation tab and click "Save To My Designs"
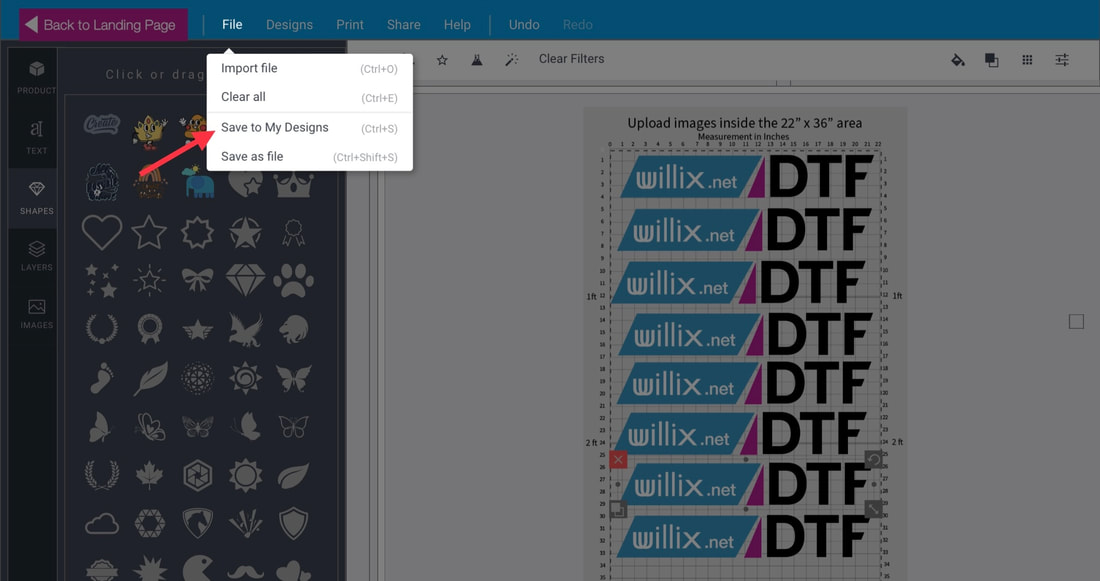
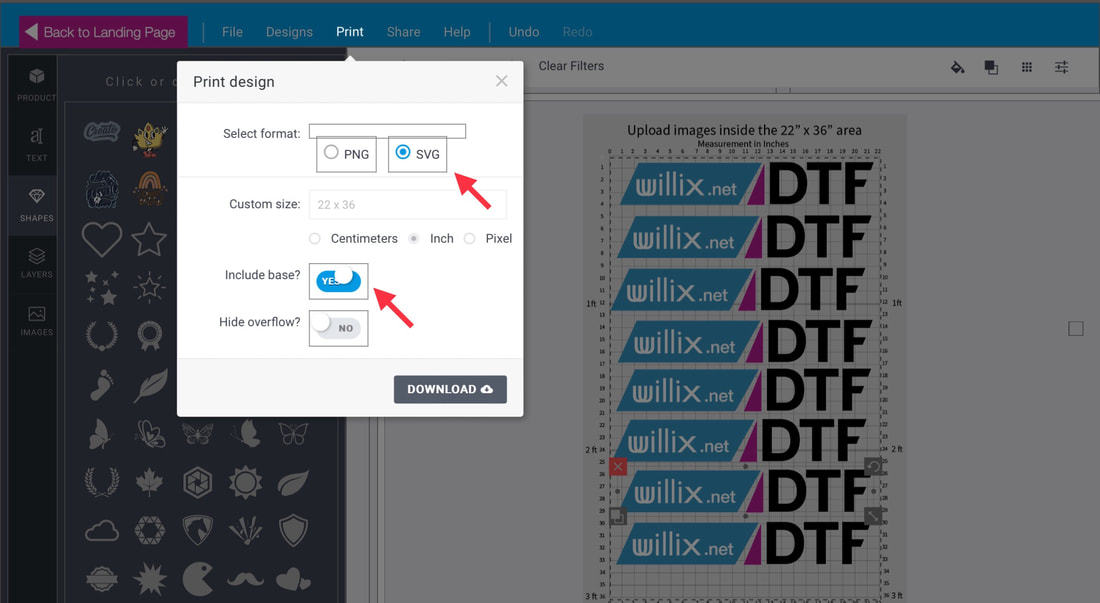
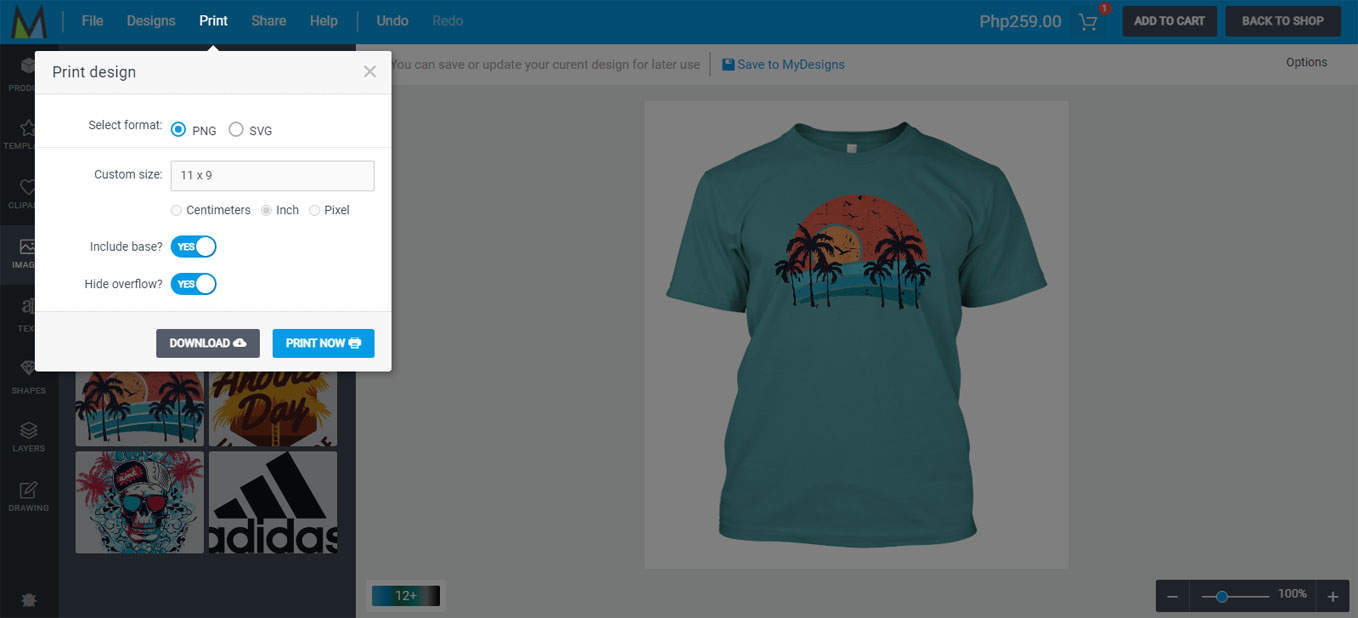
2) To download and submit, click "Print" and toggle on "SVG" and "Include Base".
3) To submit, click "Submit Design Here" and you will be redirected to another page.
How toDesign Your Apparel Designer
Select product and click "CUSTOMIZE".
The design area will open with your selected product.
Merchise resources are eight elements located on the left side of the design editor, where you can add and customize elements to your product.
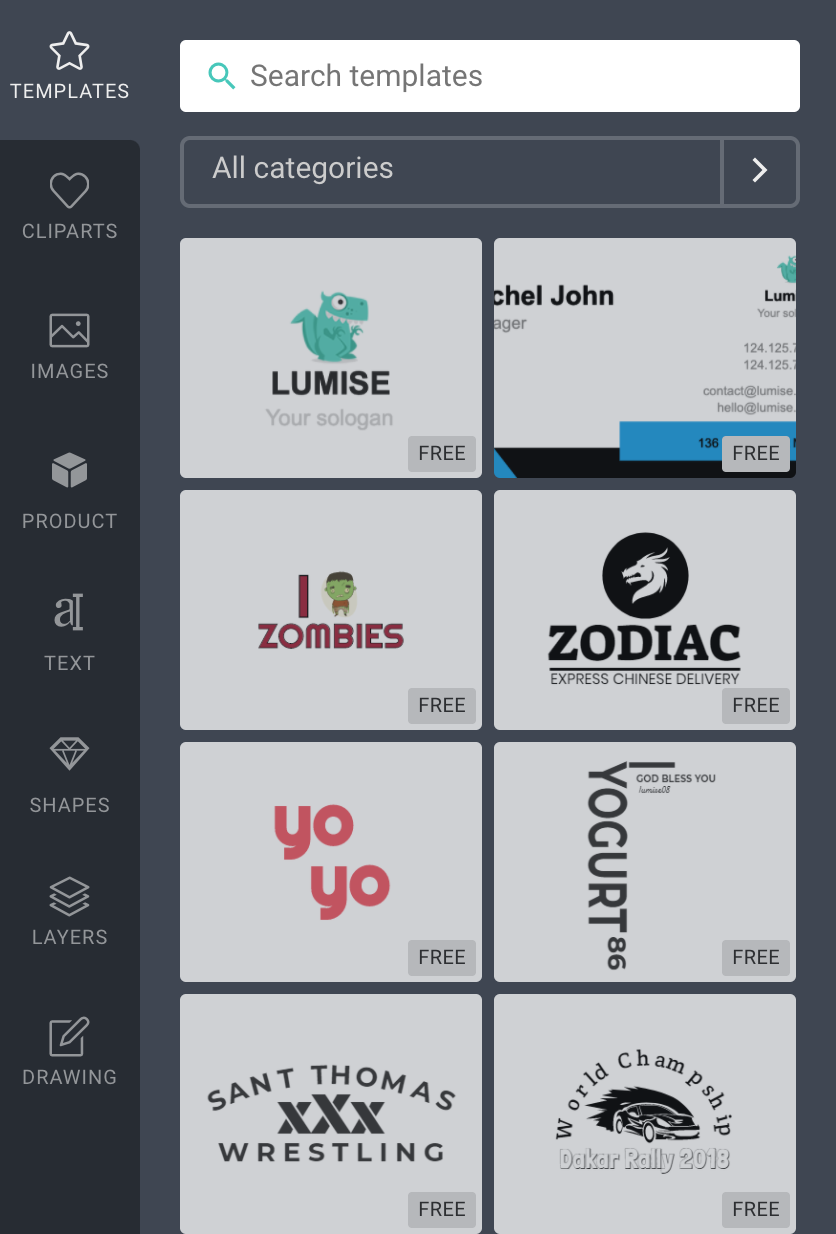
A. Templates30+ free templates are ready to use.
To select your chosen template. Drag your mouse and drop it to the product. To view more details about the template, just mouse over the (i) icon on the template. The preview will show up with template details such as name, price, tags…
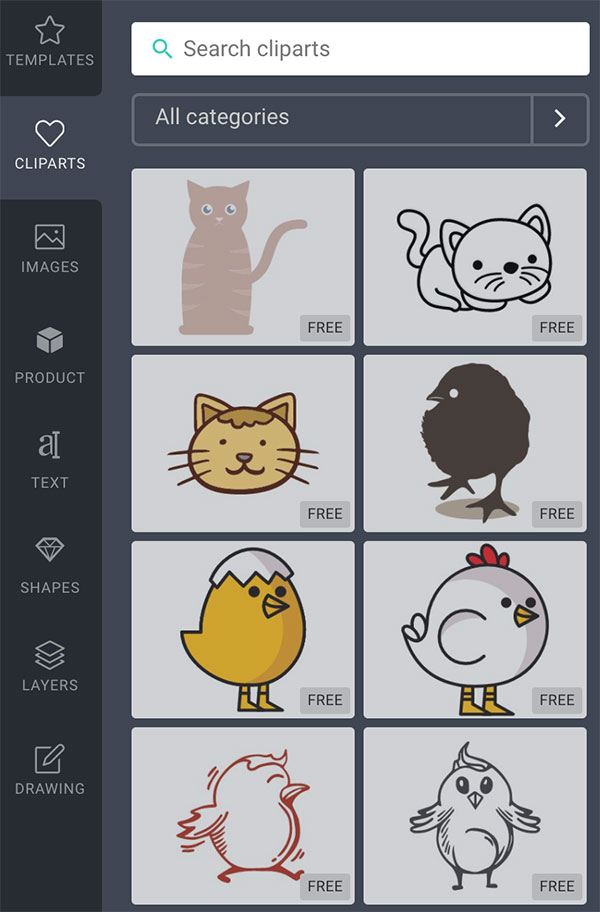
B. Cliparts
+300 free Cliparts are ready to use.
To select your chosen clipart. Drag your mouse and drop it to the product. To view more details about clipart, just mouse over the (i) icon on the clipart. The preview will show up with clipart details such as name, price, tags.
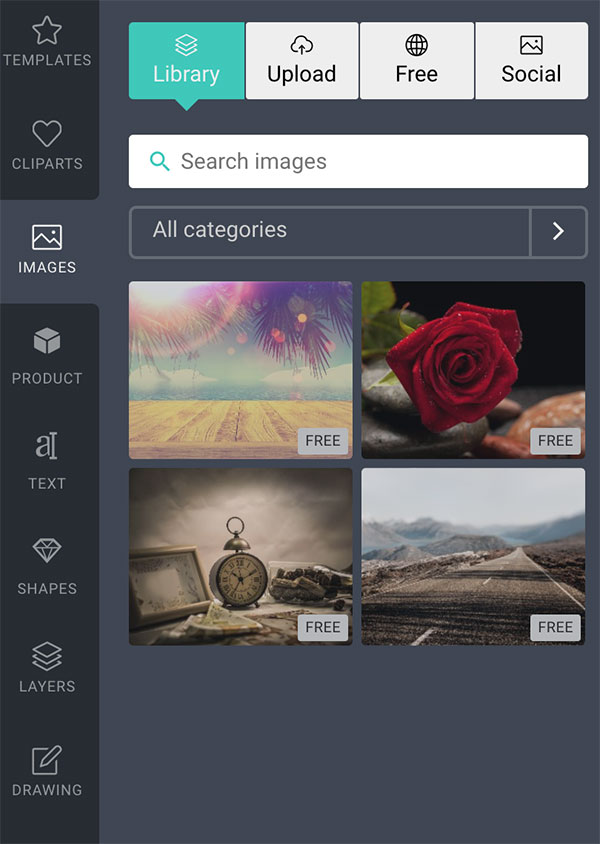
C. Images
Upload your Images. Get free images from our free gallery or some image stocks such as Pixabay, Unsplash, and Brust. To select your chosen image, drag your mouse, and drop it to the product.
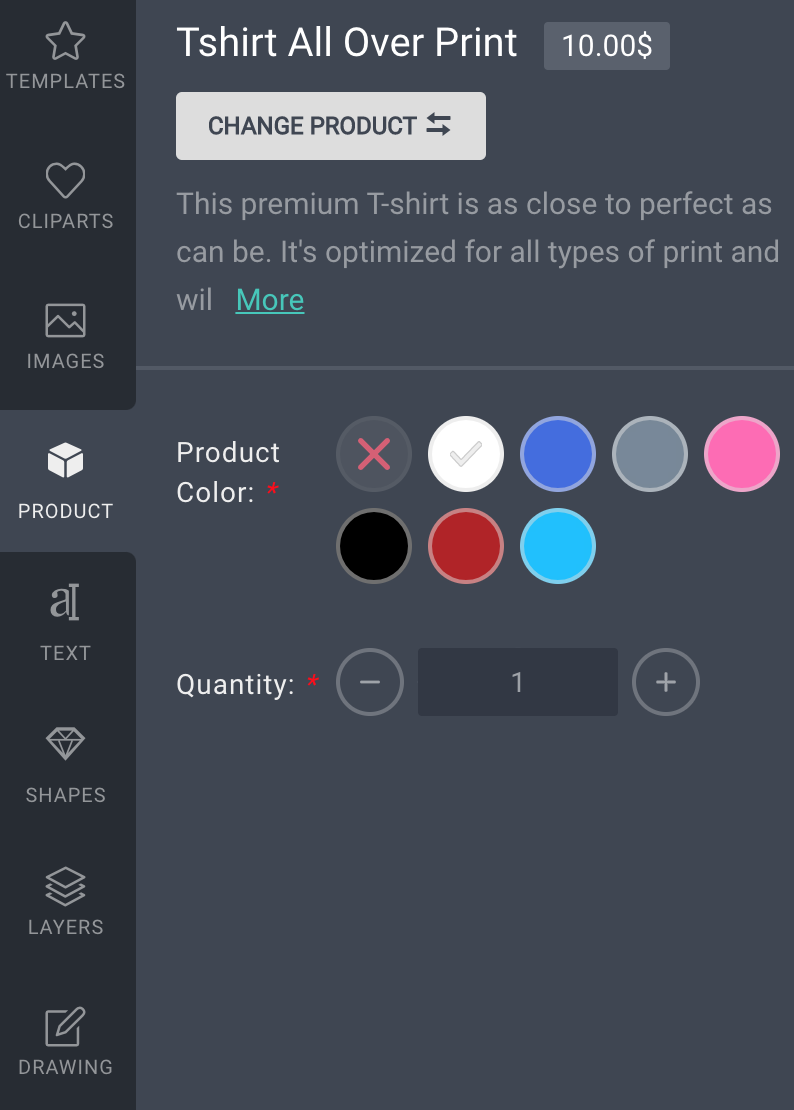
D. Product
This tab includes product info and attribute. From here, you can change your current product to another product, color, or size with the ease of a button. When you select a different attribute, the price will be updated automatically.
E. Text
To use text in your design, reach this tab and select from over 1000+ Google Fonts. To set your chosen text, drag your mouse and drop it to the product to edit.

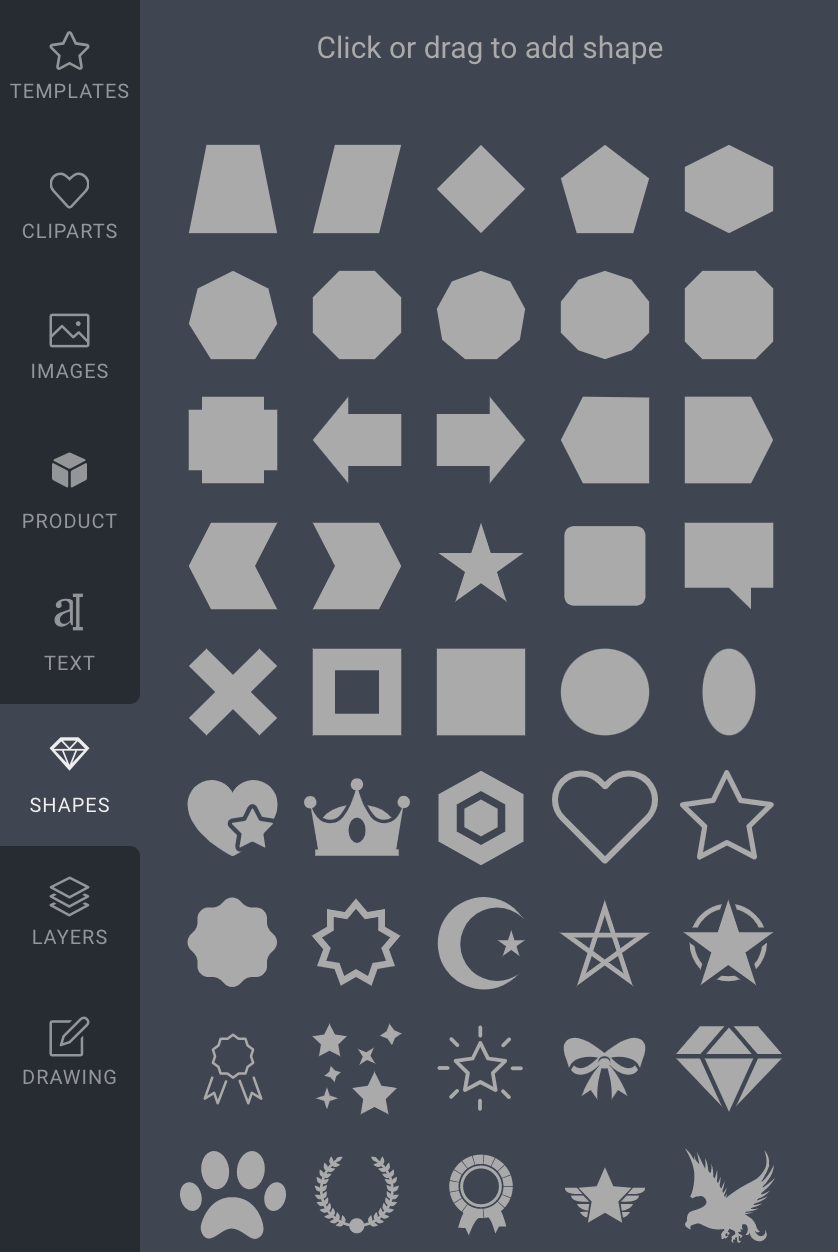
F. Shapes
Shapes are vector format, which helps design have smooth details when zoom or export without crack. You can add more shapes or choose from our pre-designed shapes. To select your chosen text, drag your mouse and drop it to the product to edit.
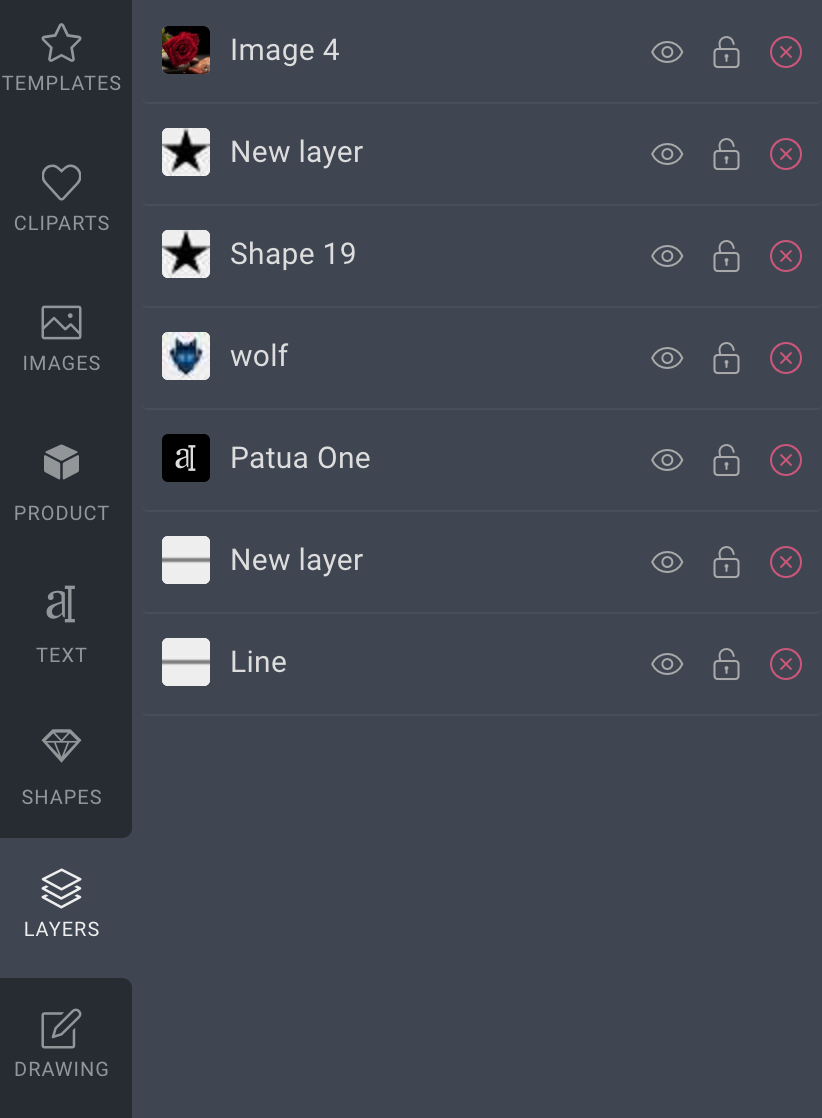
G. Layers
All layers which you added to the product will display on this tab. You can show/hide layers via the visibility option or delete layers. To change the order to back or forward other layers, drag and drop them. Lock/Unlock layers to Disable/Enable modify tools on that one.
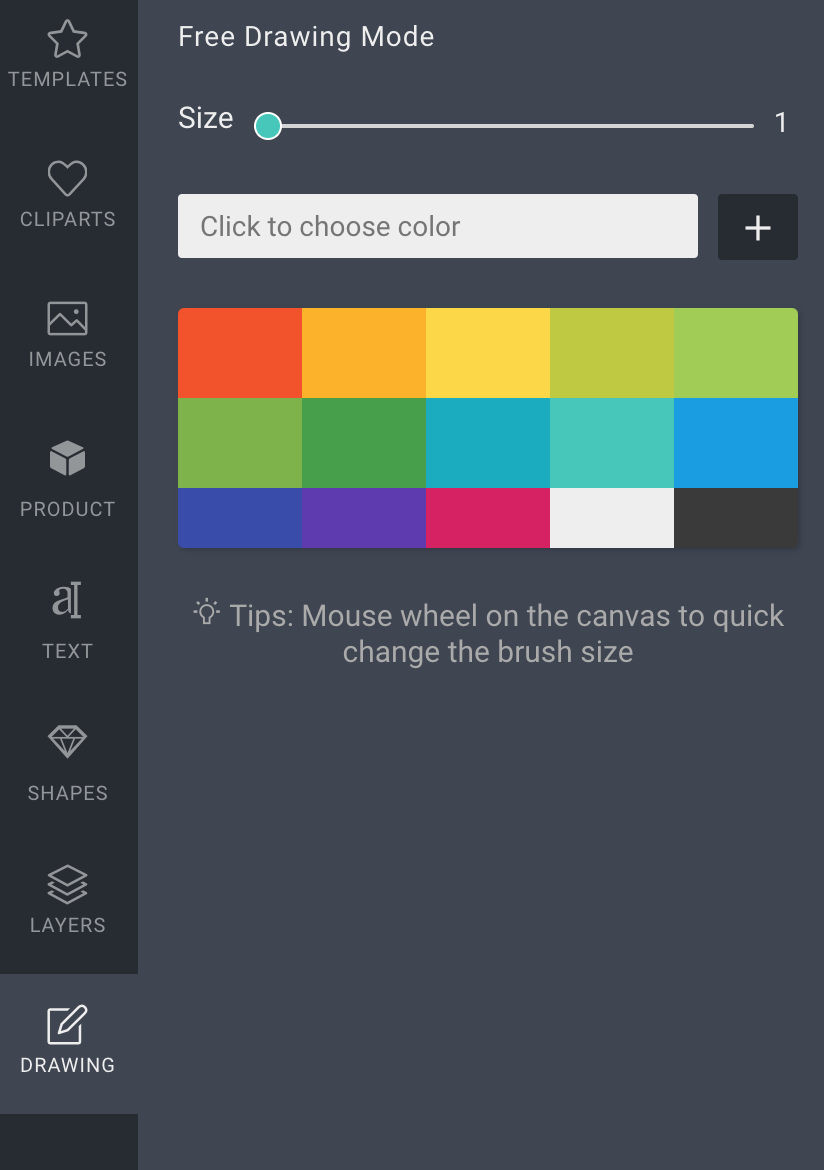
H. Drawing
This tab is setting to prepare draw info. You can select the color, size of the bush. Just click on the color you want to use and draw what you want into the editor area.
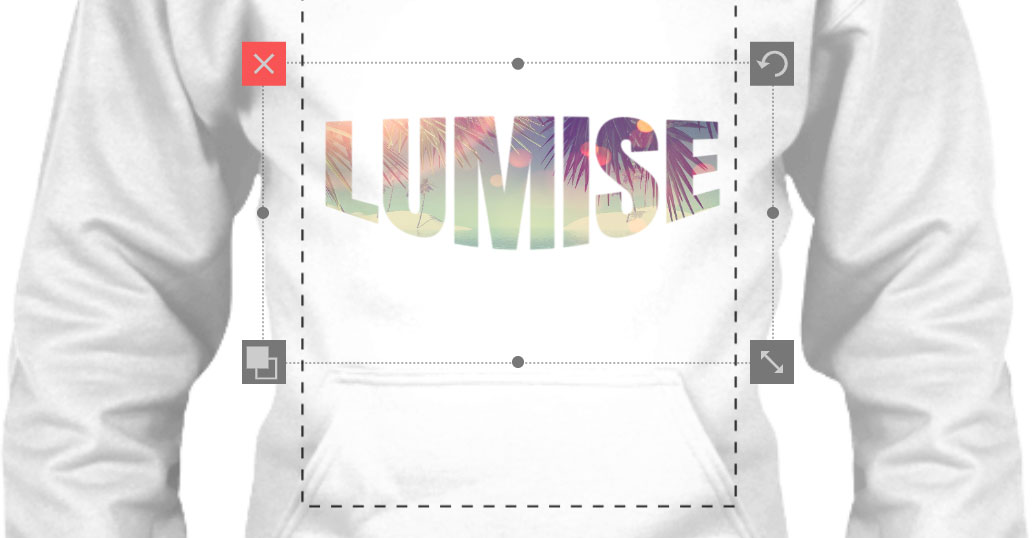
Design Area
This is the most important part of Lumise editor. It is a preview for all added layers. Click on each layer to edit or drag the mouse to adjust all layers.

There are parts of the design area:
Object editor: Customize the selected object color and effect.
Zoom tools: Scroll to zoom in or zoom out.
Stages switcher: switch design view to other stage or product.
Design area: The range for design
Toolbar: The options for selected layers include arranges, transform, and position.
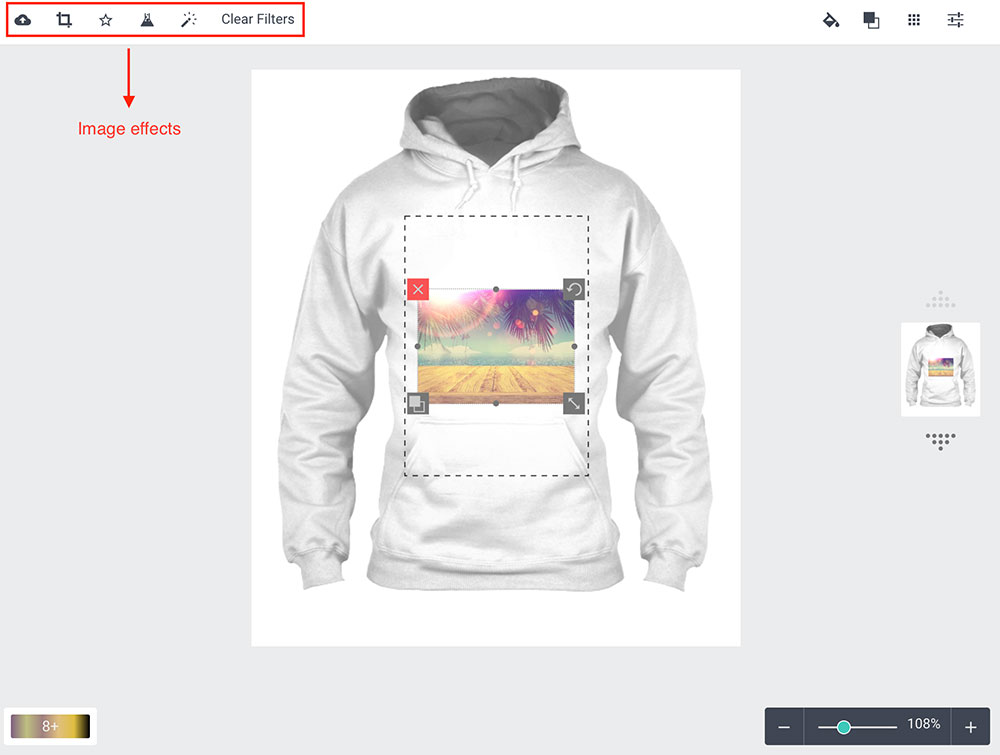
Image Toolbar
The left toolbar where you can add effects to your picture. To enable this toolbar, click on an image, and it'll appear on the top of the design editor.
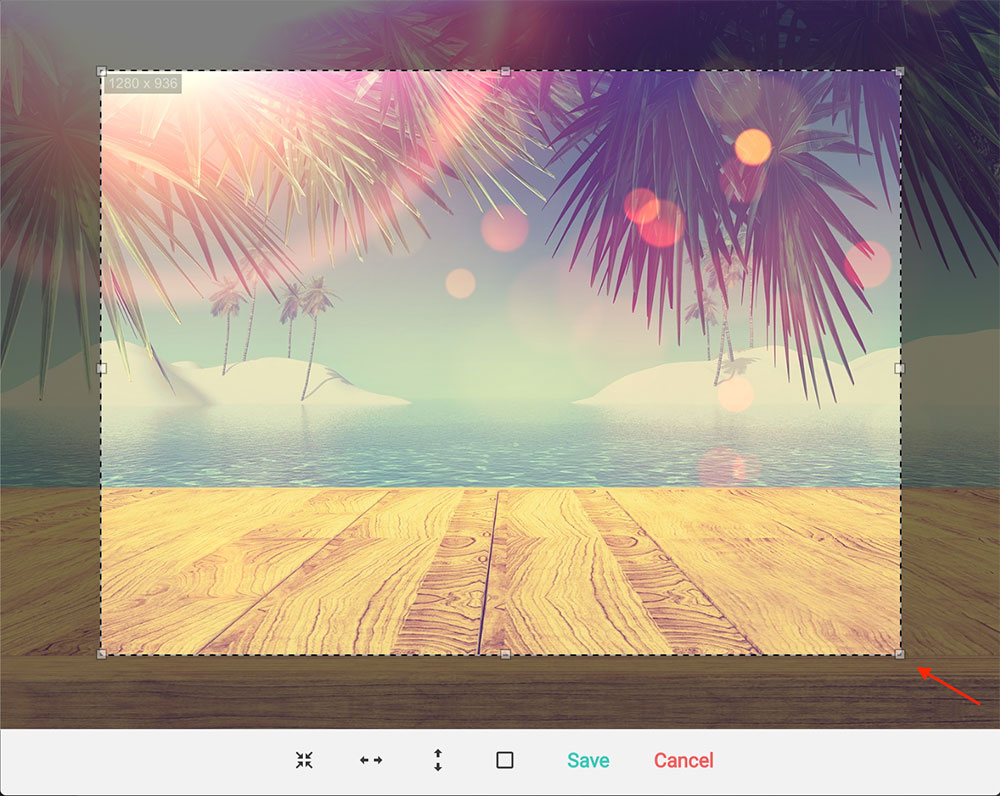
1. Crop Image
The crop image feature allows you to crop the image with the exact position you put into the viewer.
2. Image Mask
Do you want to make text with complex background from another image?
Yeah, try the Mask feature in Lumise, make your text more awesome.
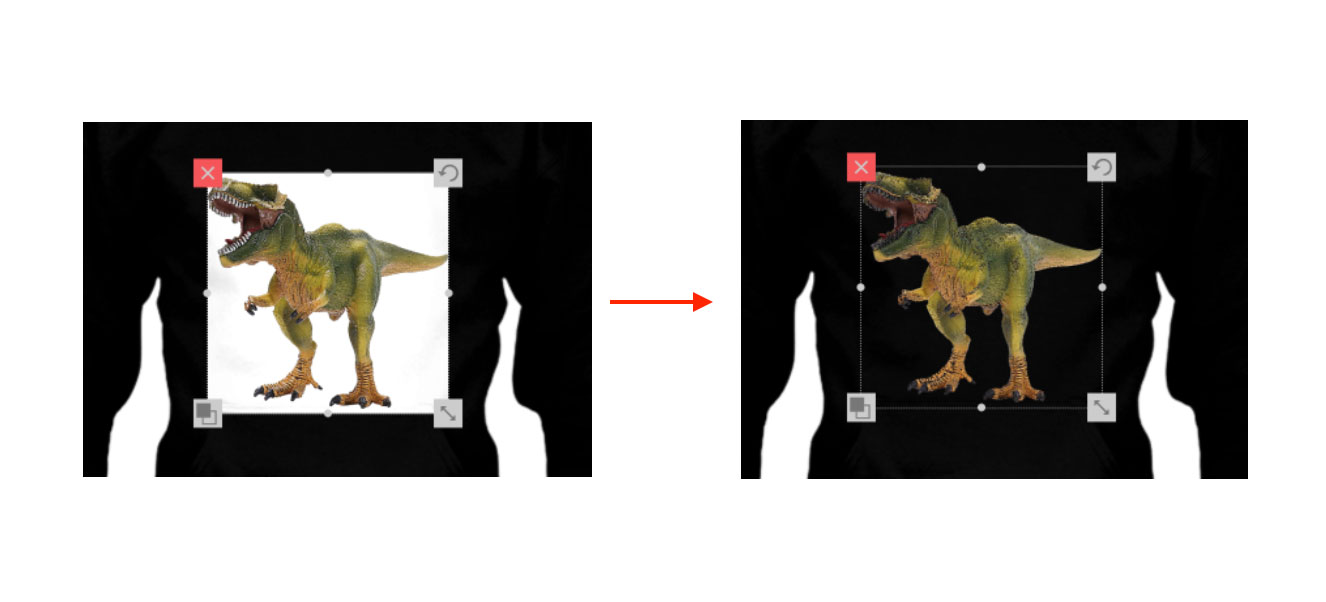
3. Remove Background
There's no need for Photoshop knowledge to remove the image background. Simply drag your mouse, and everything is settled.
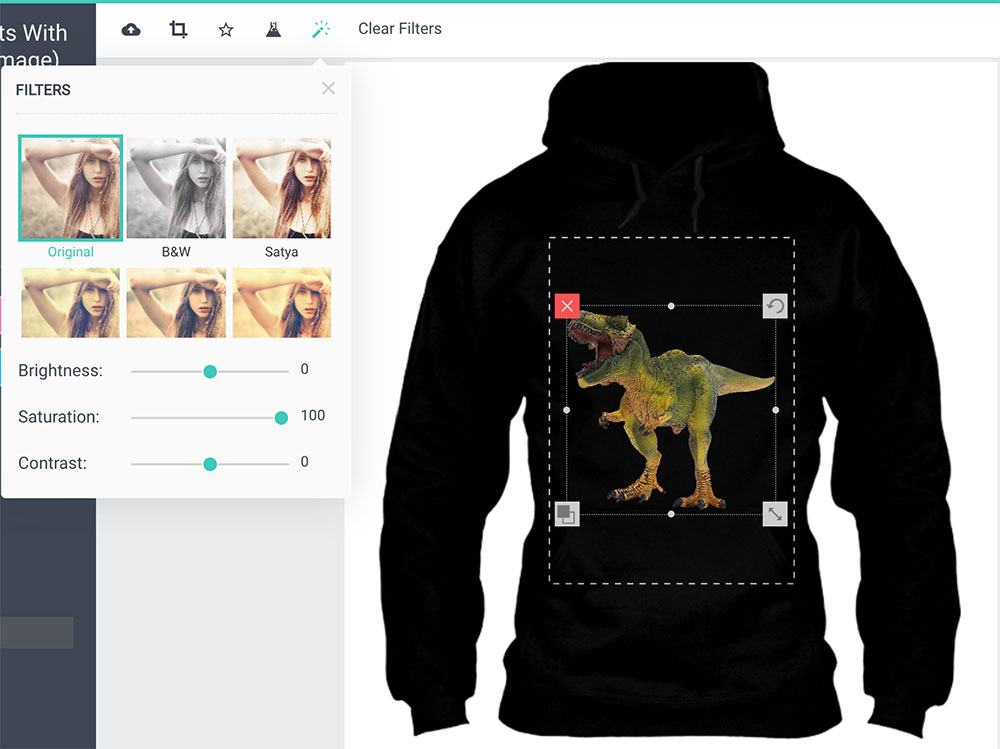
4. Image Filter Effects
Instantly, make your image professional with 20+ filters which ready to use. This feature helps you make the image have a significant effect as a filter of the camera.
Layout Toolbar
There are four options on the right toolbar that allow you to customize the picture position, transform, and color. To enable the layout toolbar, click on an image, and it'll appear on the top of the design editor.
1. Fill Color
Shape, image, and text are three objects that you can apply this fill option. The Fill Color helps users fill a solid color with the selected objects.
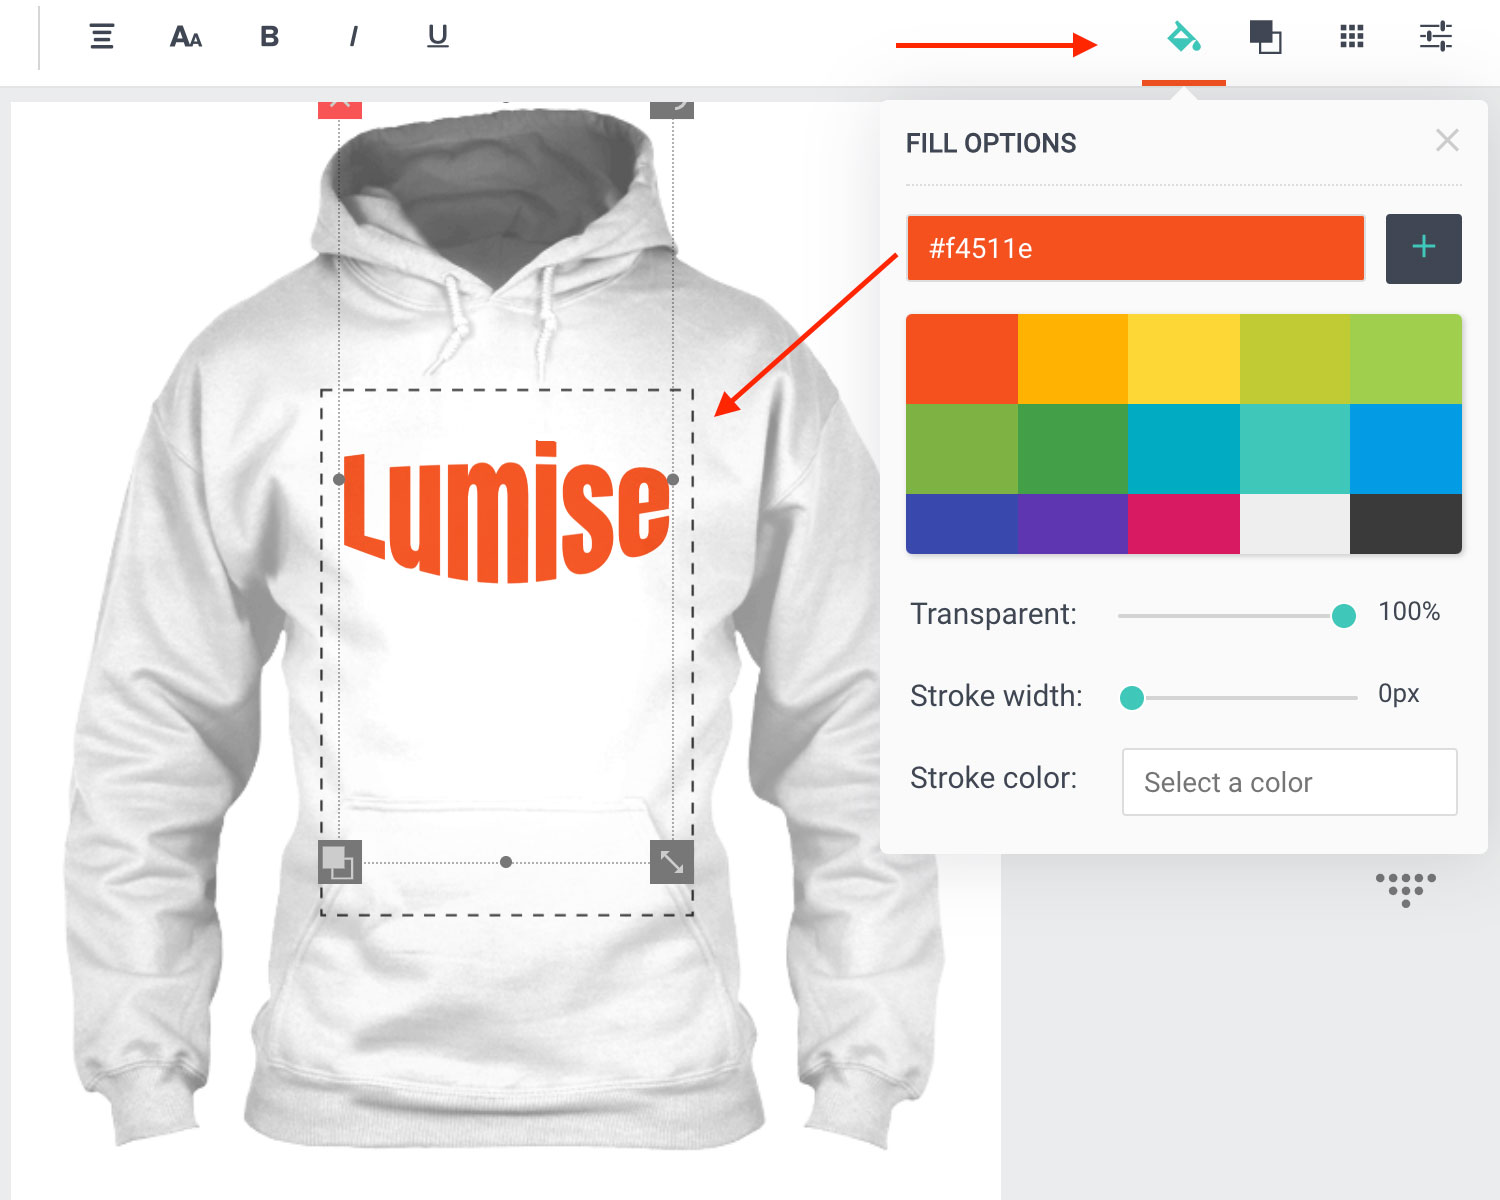
Follow these steps to work with the tool:
- Drag your mouse to select the layer you want to fill color.
- Click on the Fill Color icon on the toolbar.
- Select a color from preset colors or enter a custom value by click on input Click to choose color.
- To save custom color just press the plus (+) button next to add.
- Transparent help you change the opacity of the filled color.
- Stroke width + Stroke color allow you to make the border color for the current layer.
2. Arrange Layers
The Lumise editor works base on layers. Quickly arrange the selected object position either backward or forward.
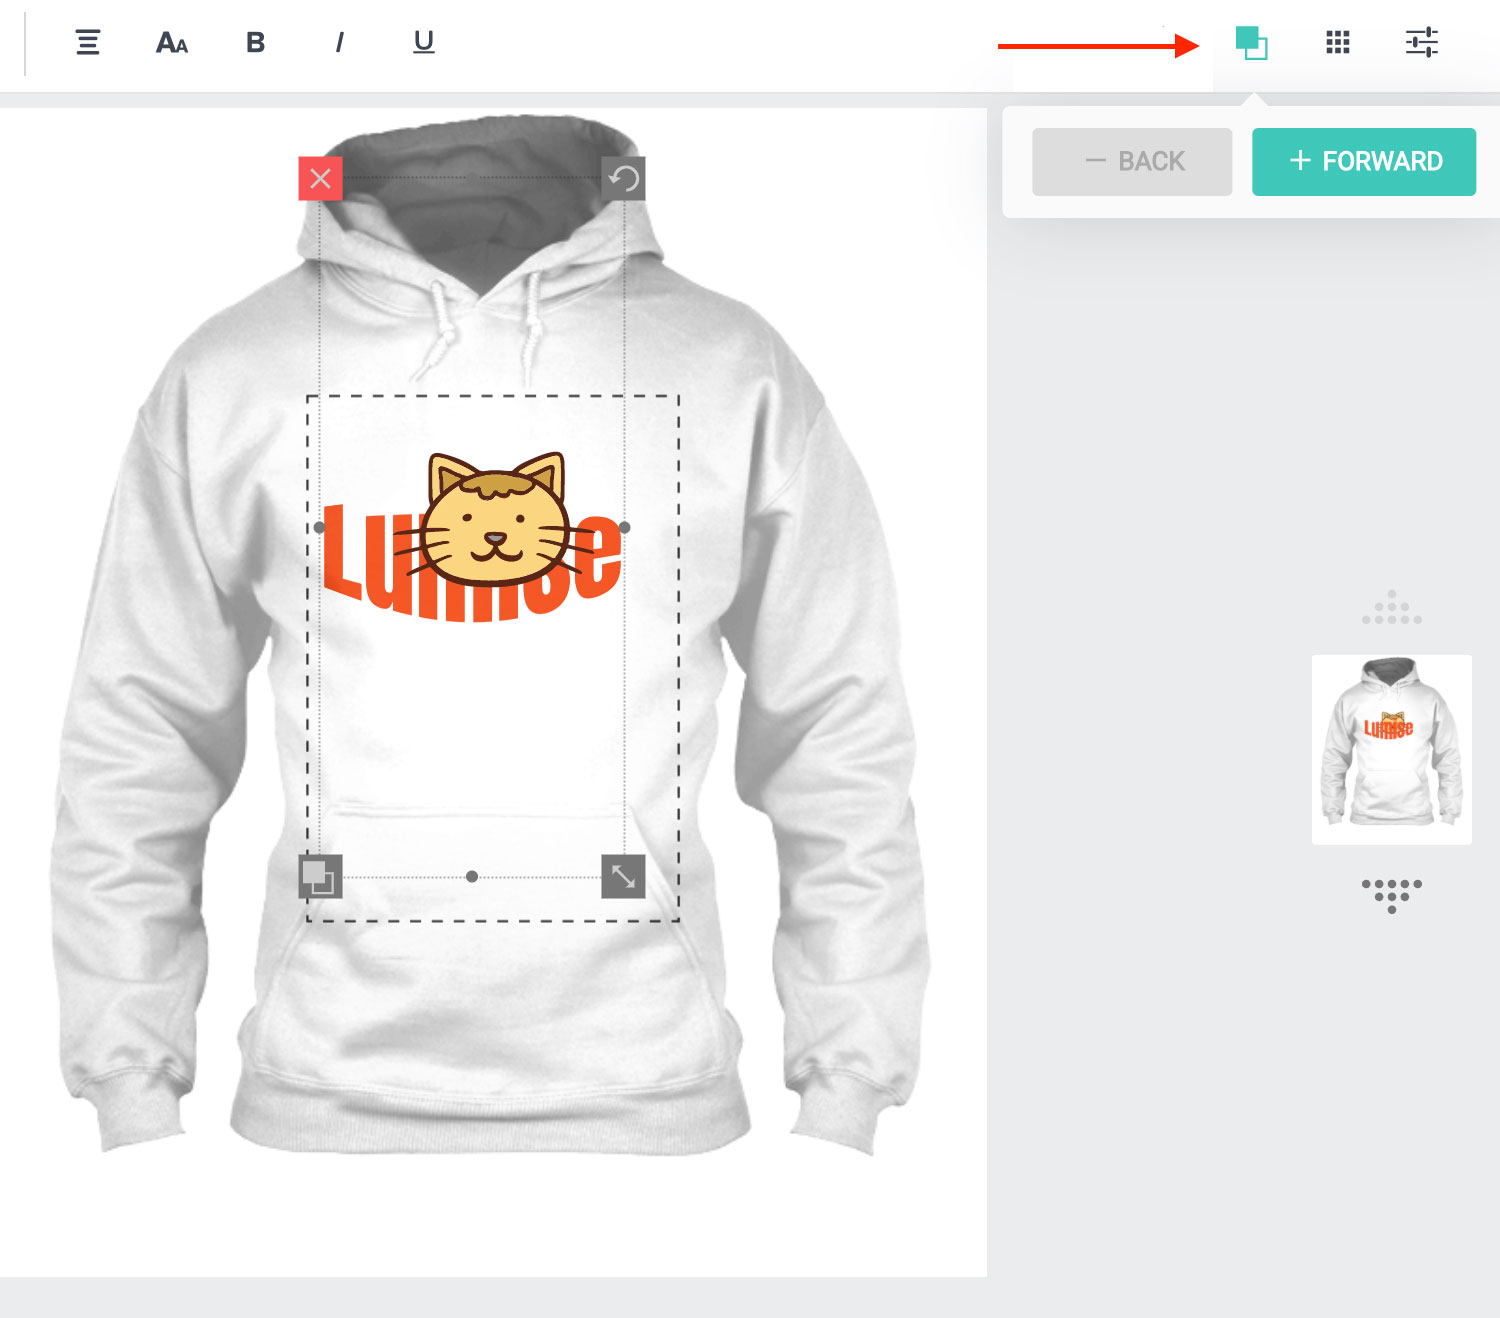
Follow steps to work with this tool:
- Chose the layer you want to change.
- Click on the Arrange Layers icon on the toolbar.
- Select Forward or Back action to change the object order.
3. Position
Whether you want to put it in the right corner or center.
The Layer Position tool allows you to place the selected object in the correct position with one click.
Switch the Lock object position to YES, if you want to continue design without affect the current object.
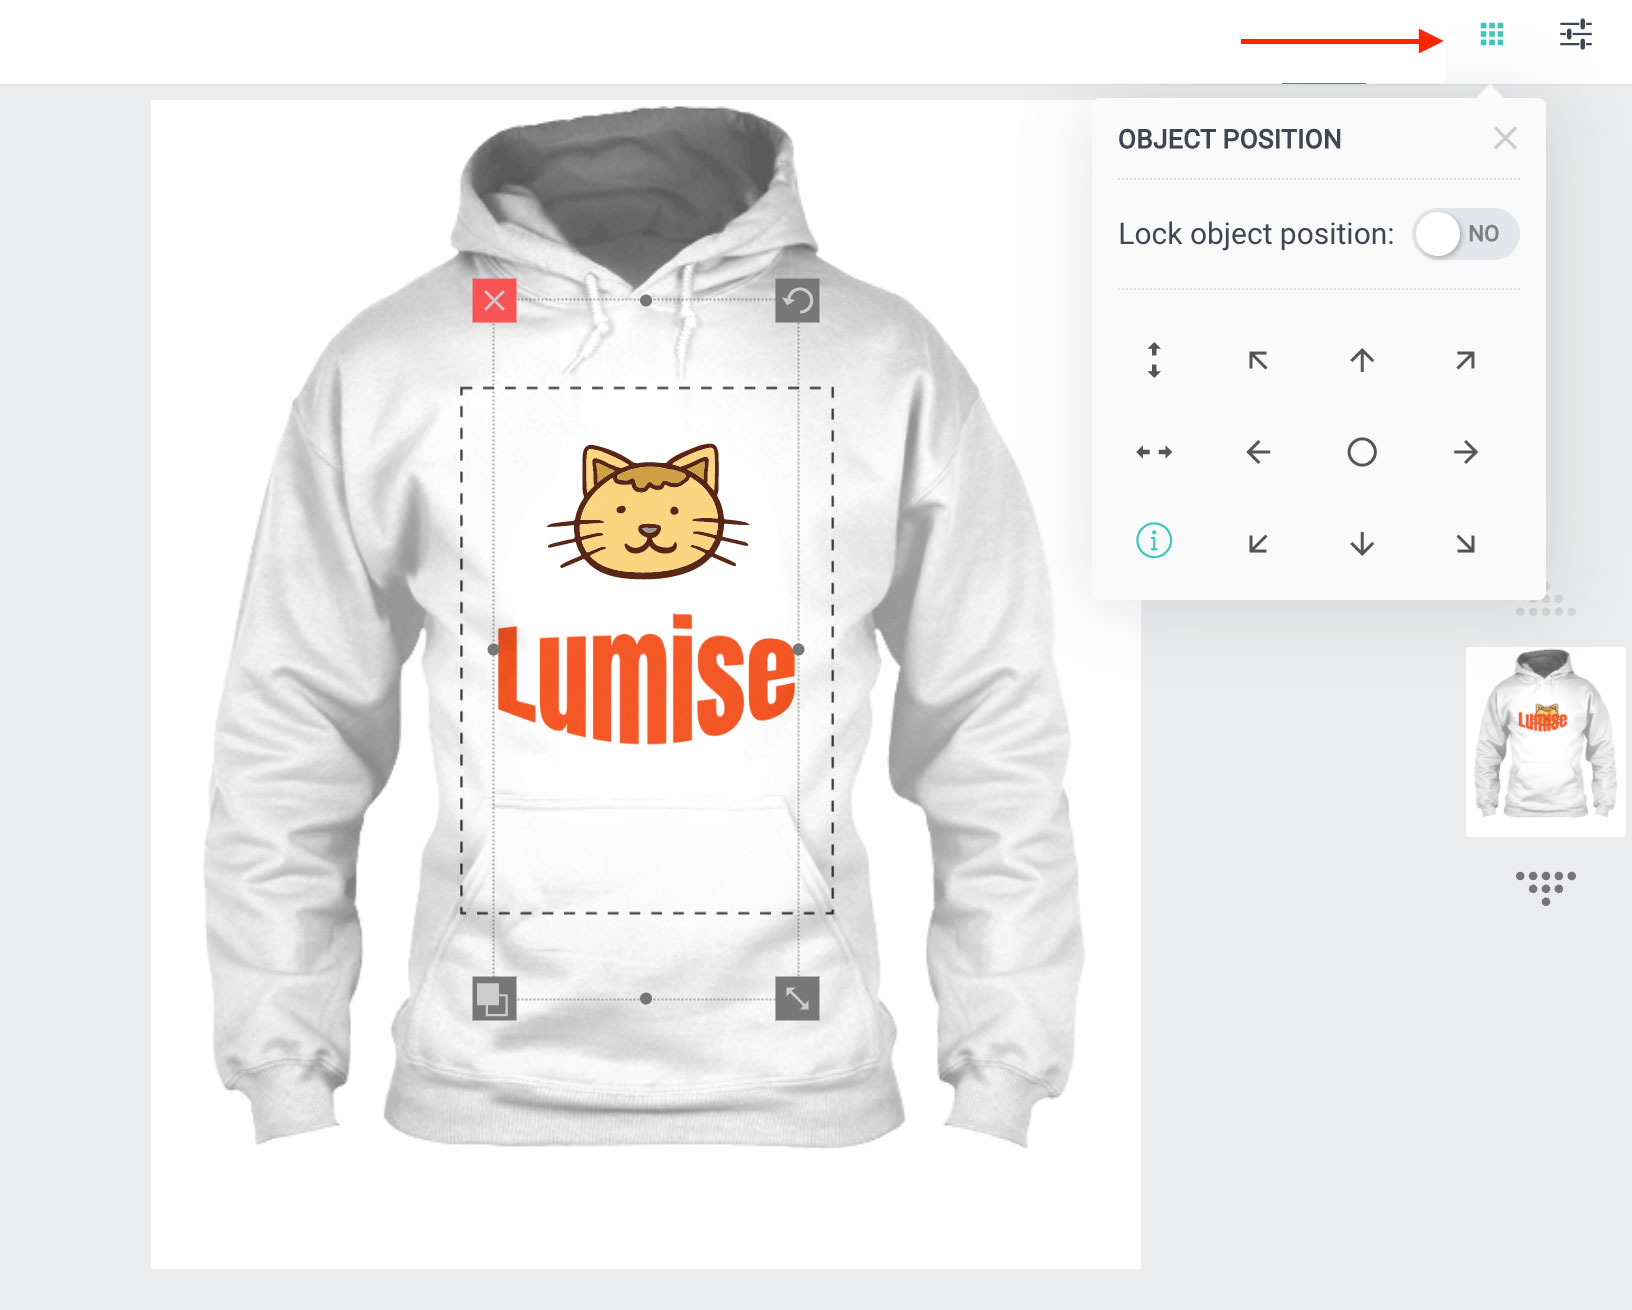
Follow steps to work with this tool:
- Select the layer you want to move
- Click on the Position icon on the toolbar
- Choose the position you wish to move the layer to.
4. Transform Manual
When using the transform tool directly, it is hard to know how many angles rotated or flipped. The Lumise provides a manual way to set transform values for a layer.
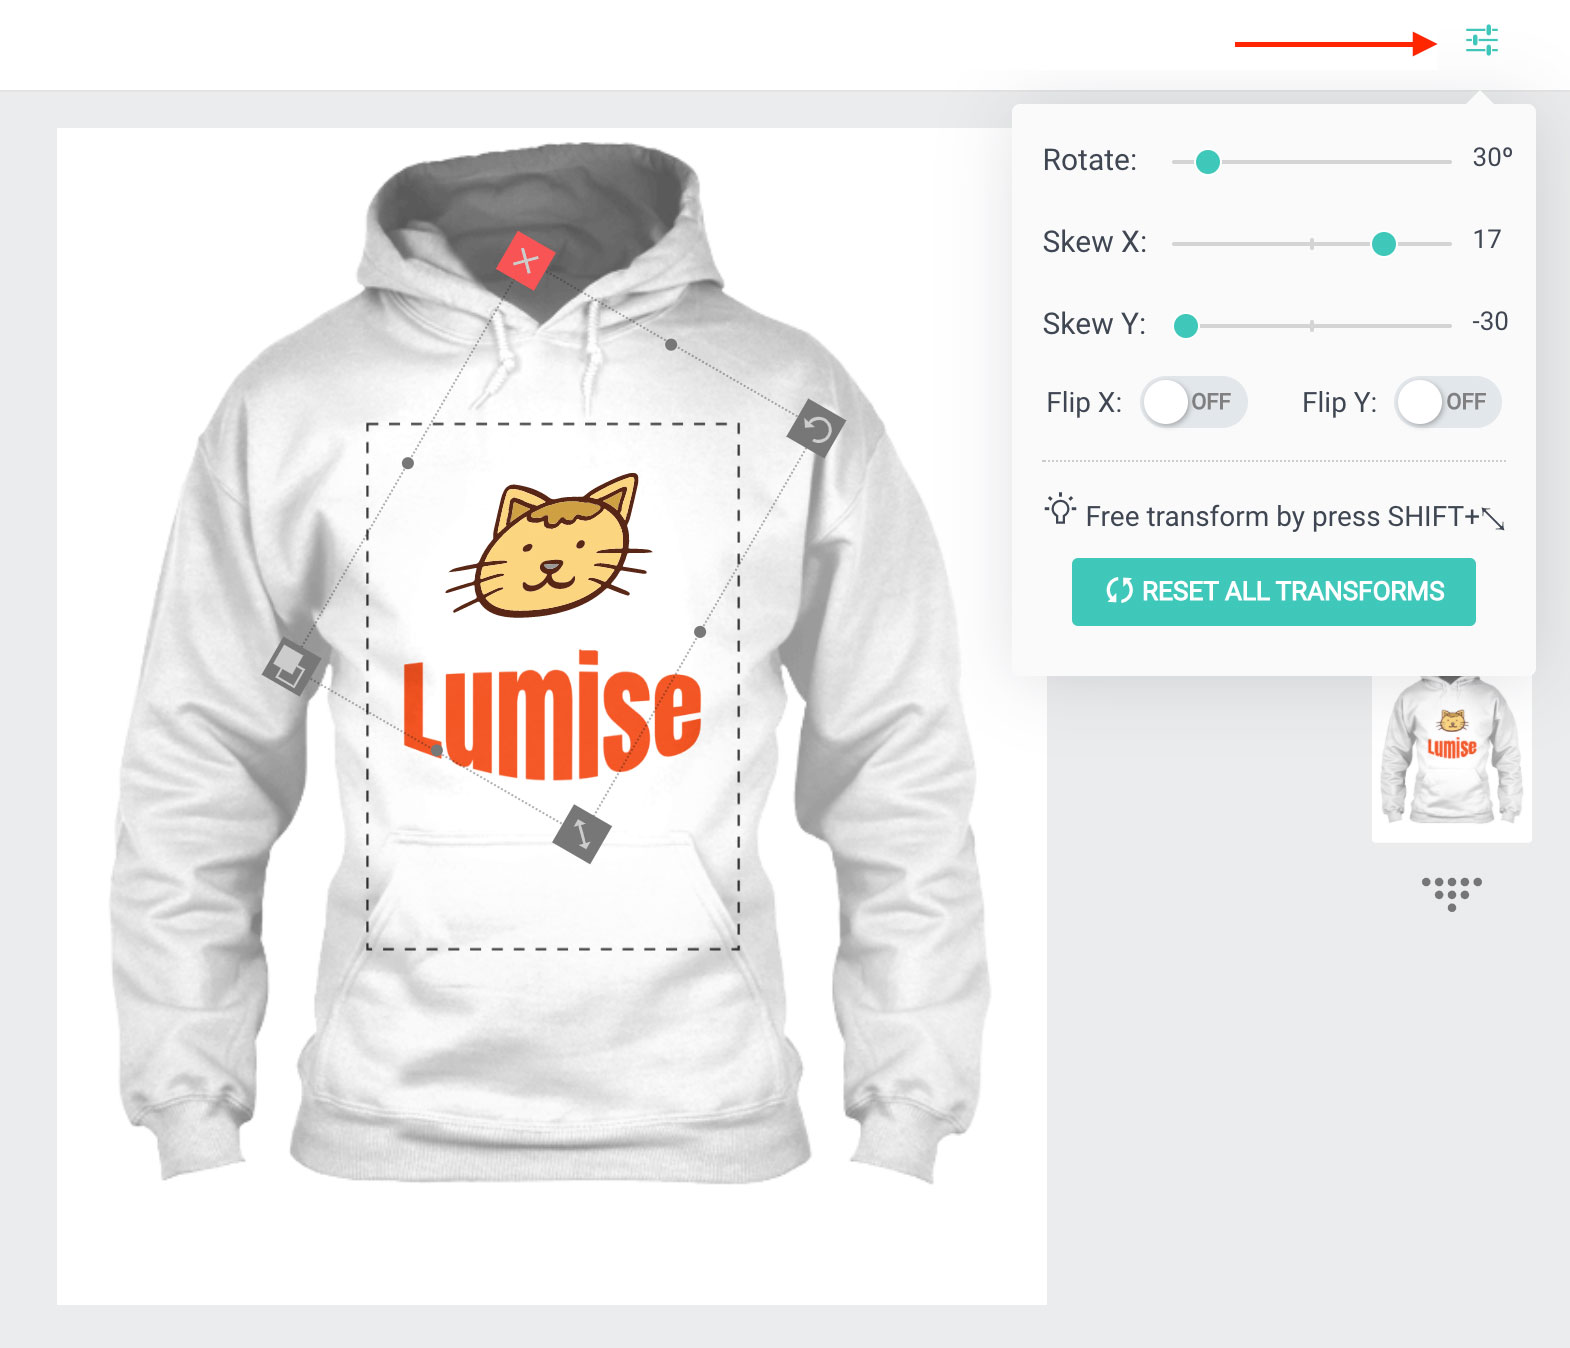
Follow steps to work with the tool:
- Chose the layer you want to change.
- Click on the Transform icon on the toolbar.
- Adjust the values you want to set.
The values you can set for the object as bellow:
- Rotate: the edge of an object. start from 0 – 360
- Skew X: skews layer along the X-axis by the given angle
- Skew Y: skews layer along the Y-axis by the given angle
- Flip X: Horizontal flip your layer
- Flip Y: Vertical flip your layer.
Of course, you can cancel all applied values by press the Reset All Transform button.
Text Toolbar
With a text added to the design area. There are some options for it. To enable options, just mouse over to the selected text and see the top toolbar as show below:
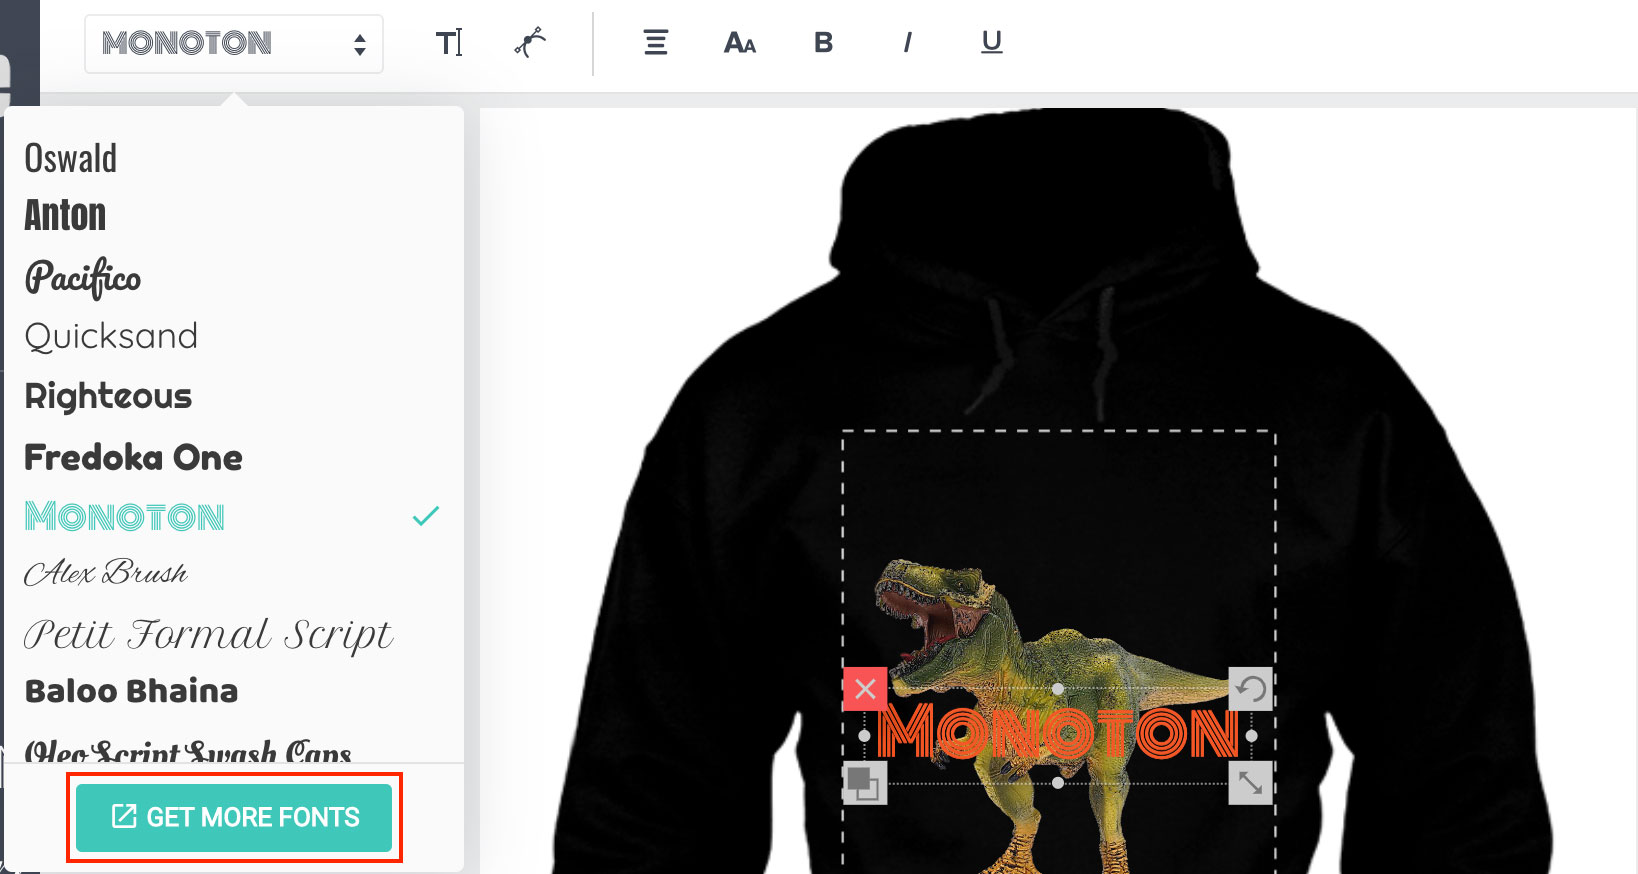
1. Font Family
This option allows you to switch to another font family easily. To use more font, just press the Get More Fonts button.
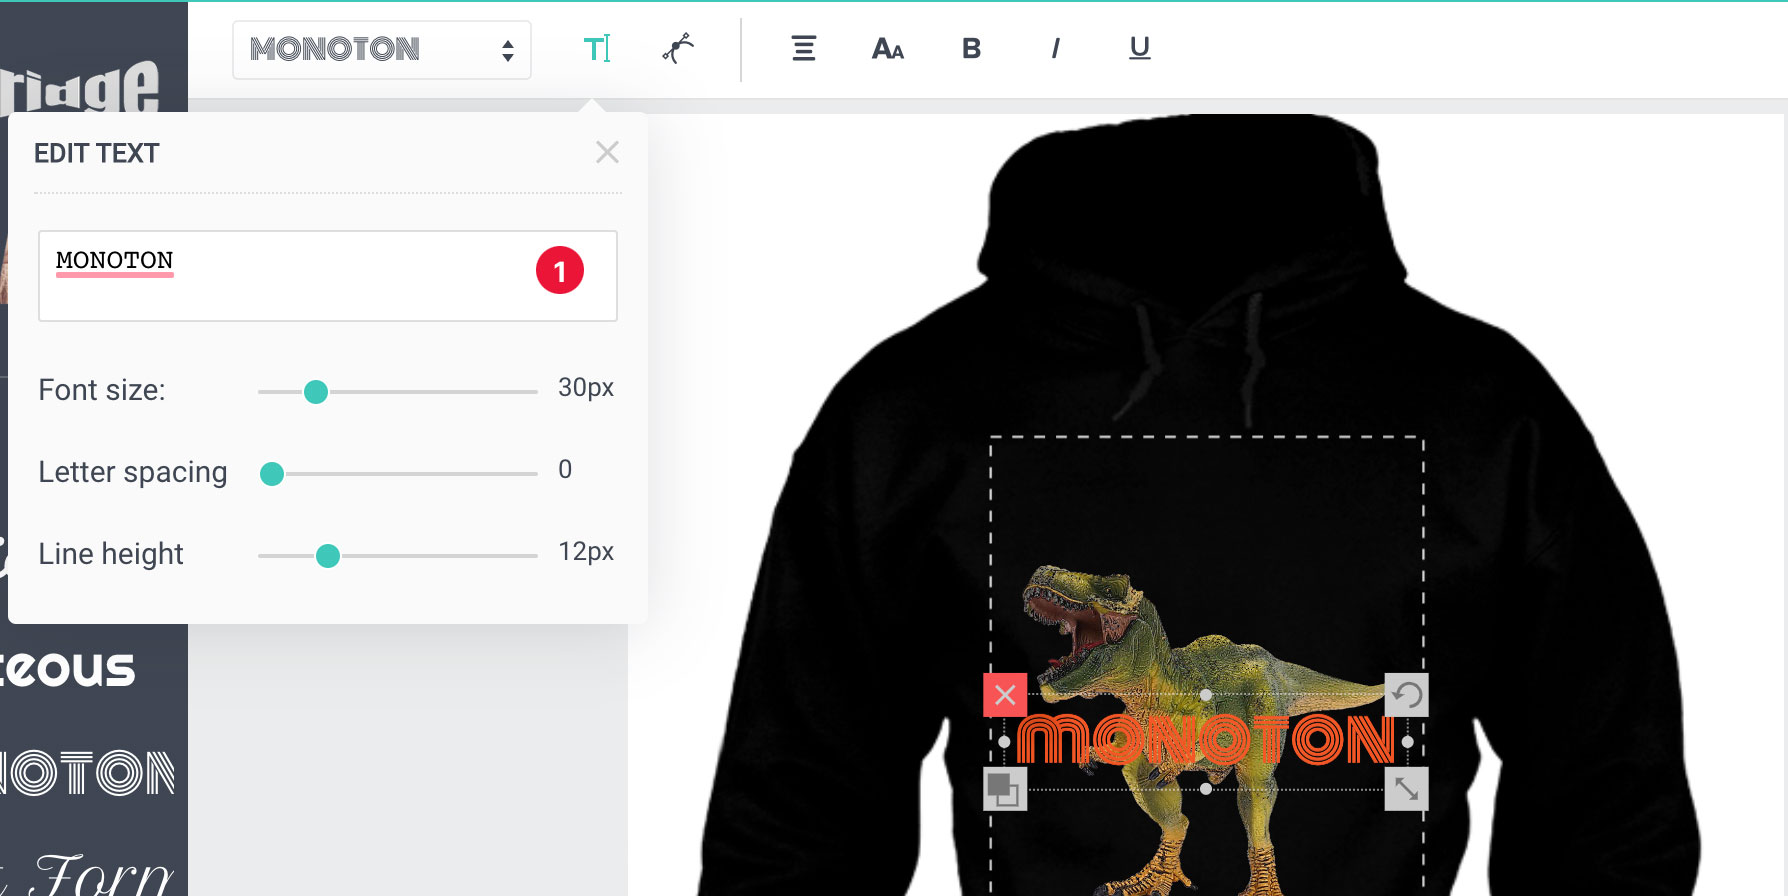
2. Font Advance
This tool allows you to change the font-size, line-height even text content
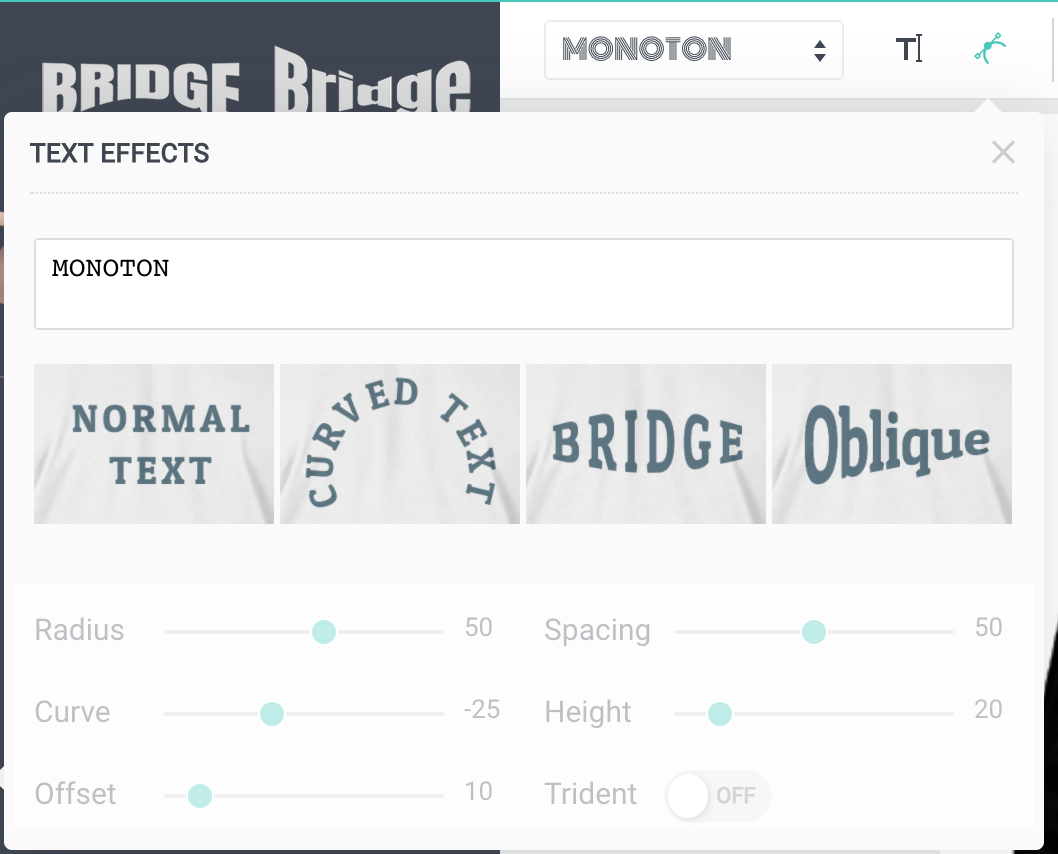
3. Text Effects
There are four text effects on Lumise. Select a text and choose Text Effect icon to customize your text.
4. Text Style
These options help you change text style as bold, underline, italic, or text-align.

Save your design and download
As an application on the desktop, the Merchise menu is a navigation bar located in the top left corner of the design editor
To save your product, click the link “Save to Mydesigns” located on top of your product on the design editor.
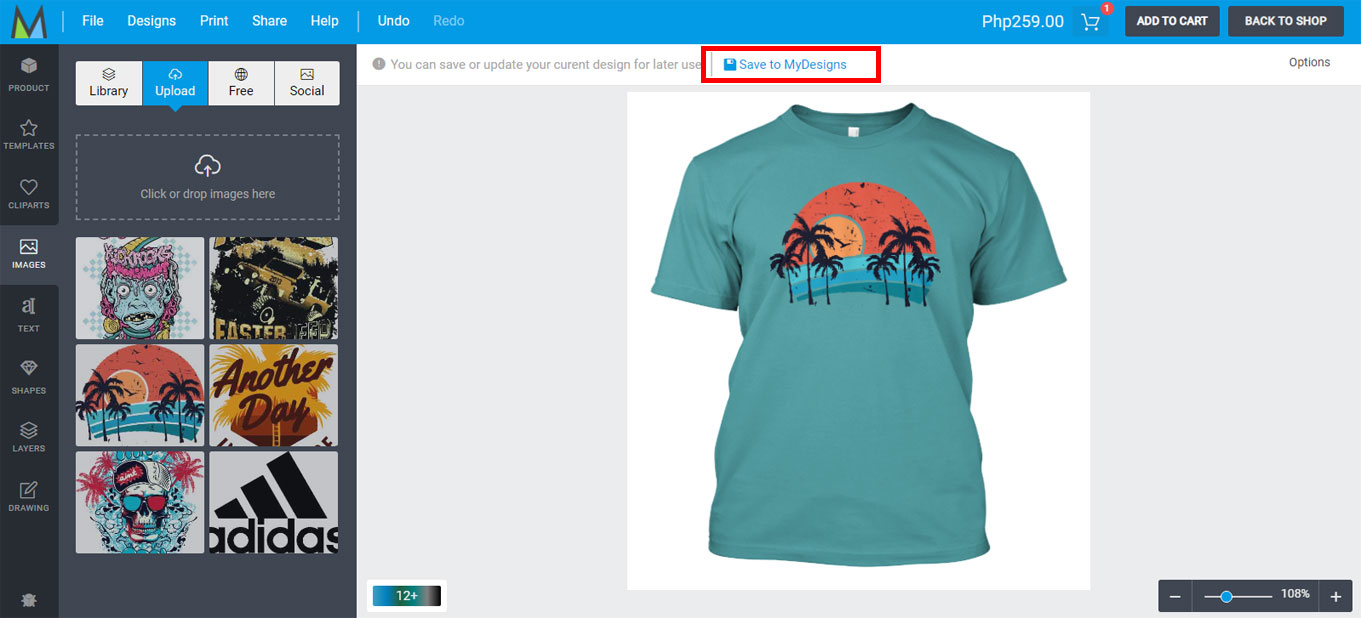
Your design will be saved on the device used in making the design. A maximum of 12 designs can only be saved on your device.
A product mock-up shall be uploaded as the image/s for a gig and merch posting.
If you need to talk to our artists and technical people, you may
1) Call us at 0916-6984321.
2) Message us via FB page Willix eco- smart DTF
3) Send Email to sales@willixsports.com- ctrl+a
Select all objects
ctrl+d Double the activate object
ctrl+e Clear all objects
ctrl+s Save current stage to my design
ctrl+o Open a file to import design
ctrl+p Print
ctrl++ Zoom out
ctrl+- Zoom in
ctrl+0 Reset zoom
ctrl+z Undo changes
ctrl+shift+z Redo changes
ctrl+shift+s Download current design
delete Delete the activate object
← Move the activate object to left
↑ Move the activate object to top
→ Move the activate object to right
↓ Move the activate object to bottom
shift+← Move the activate object to left 10px
shift+↑ Move the activate object to top 10px
shift+→ Move the activate object to right 10px
shift+↓ Move the activate object to bottom 10px 
Copyright © 2023 Merchise by Willix.
All Rights Reserved.Powered by Lumise version 1.9.7
-
- Shop
- Undo
- Redo


-
Start designing by adding objects from the left side
- All selected objects are grouped | Ungroup?
- Group objects Group the position of selected objects
-
-
Fill options
Save this color
-
- Create QRCode
-
Options
-
Automatically align the position of
the active object with other objects -
ON: Keep all current objects and append the template into
OFF: Clear all objects before installing the template -
Replace the selected image object instead of creating a new one
-
- Replace image
- Crop
-
Mask
-
Select mask layer
-
-
Remove background
-
Remove background
-
Deep:
-
Mode:
-
-
Filters
-
Filters
-
- Original
- B&W
- Satya
- Doris
- Sanna
- Vintage
- Gordon
- Carl
- Shaan
- Tonny
- Peter
- Greg
- Josh
- Karen
- Melissa
- Salomon
- Sophia
- Adrian
- Roxy
- Singe
- Borg
- Ventura
- Andy
- Vivid
- Purple
- Thresh
- Aqua
- Edge wood
- Aladin
- Amber
- Anne
- Doug
- Earl
- Kevin
- Polak
- Stan
-
Brightness:
-
Saturation:
-
Contrast:
-
- Clear Filters
- Click then drag the mouse to start drawing. Ctrl+Z = undo, Ctrl+Shift+Z = redo
- QRCode text
-
Fill options
-
Fill options
Save this color
-
Transparent:
-
Stroke width:
-
Stroke color:
-
- Ungroup position
-
Arrange layers
-
Position
-
Object position
Lock object position:
-
Center vertical
-
Top left
-
Top center
-
Top right
-
Center Horizontal
-
Middle left
-
Middle center
-
Middle right
-
Press ← ↑ → ↓ to move 1 px,
Hit simultaneously SHIFT key to move 10px -
Bottom left
-
Bottom center
-
Bottom right
-
-
Transforms
-
Rotate:
-
Skew X:
-
Skew Y:
-
Flip X:
Flip Y:
Free transform by press SHIFT+⤡
-
-
Font family
-
Edit text
-
Edit text
-
-
Font size:
-
Letter spacing
-
Line height
-
-
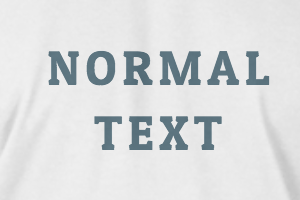
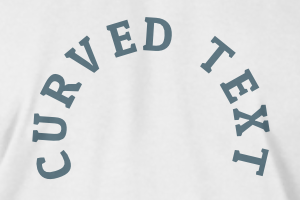
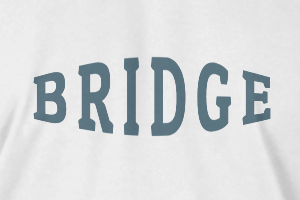
Text Effects
-
Text effects
-
-
Radius
-
Spacing
-
Curve
-
Height
-
Offset
-
Trident
-
-
Text align
- Uppercase / Lowercase
- Font weight bold
- Text style italic
- Text underline